Thursday, 31 July 2014

George Sampson Shows Us His MUves!

There is nothing I enjoy more than attending blogger events, especially when all the family are involved and we get to experience something fun and entertaining. When that also involves meeting a former Britain's Got Talent winner, the event being held at the fantastic Football Museum in Manchester and a little cheese tasting, well how could myself and the children not go! The 2008 winner we were all excited to meet was none other than George Sampson, and who you may remember gave a great street dance performance to 'Singin in the Rain' in the 2008 final which he won. George, who has collaborated with MU Cheese was a pleasure to meet, a fun friendly guy and the children really warmed to him. Here he is demonstrating some of the moves they learnt on the day.


George came along to meet the youngsters and teach them some of his popular moves, my two had great fun and really enjoyed meeting him. Along with all the other children, Master Poppins really got into the groove!


Soon they were all putting the steps together and coming up with a cool little dance sequence, George was very obliging when we asked for a photograph!


We were very impressed with his moves!


We had a brilliant afternoon at the The National Football Museum which I highly recommend a visit to. Being free (though donations are welcome) is always a bonus!


It's jam packed with all sorts of football related interests and I had just as much fun as the children. As George is working alongside MU cheese, which is available in six great variety's from Tesco, of course there had to be a little cheese tasting too at the event. Myself and my family hadn't yet tried out MU cheese and so we were very eager to see what it tasted like. Afterwards we were sent home with some packs of MU cheese to try out and see what we thought. Of course certain little members of my family couldn't wait to get all the way back to try some, so sneaked in a little bite on the way home. When asked what it was like. The reply was a simple...

"Yummy"!


When back home it was time for us all tuck in, and I'll pop back soon to share what we all thought. 

X


Wednesday, 23 July 2014

Pretties From Dotcomgiftshop

I absolutely love Dotcomgiftshop and can often be found late at night browsing their website in search of pretty little things to cheer up the home and as gifts for friends and loved ones. Its quite hard not to get over excited when one of their infamous brown boxes with Dotcomgiftshop tape around it arrives and I can't wait to delve in, remembering what I purchased. Of course, being such a fan of the site, I jumped at the opportunity to review a couple of their products and see what I thought...

Both items are perfect for night time and I couldn't wait to give them a whirl! First up we have these oh so pretty and cute Candy Spot Party Lights which are just divine! Even before I got the lights out of the sweet packaging, I was pretty much hooked on them! 


Obviously they look lovely in the day time but it is at night where they really come into their own. I decided to display the lights on a chest of drawers in the hallway, my thinking being it would create a colourful welcome at night. 


I wanted them to be displayed in a random and natural way and they bring a perfect cheery warm glow to the area. 


As I have an oversized lantern in the same area, I wondered what they would look like in there, and I just loved the look! 


They are plug in so you just need a socket pretty close by to where you want to display them and you're ready to go! I was also thinking of displaying them around the mantlepiece in the front room, however the pre-teen of the house had already bagsied them for around her bed, so it seems I'm not going to get a look in. I would definitely recommend the string of lights, which are not only perfect for any party occasion but for everyday prettiness too.   

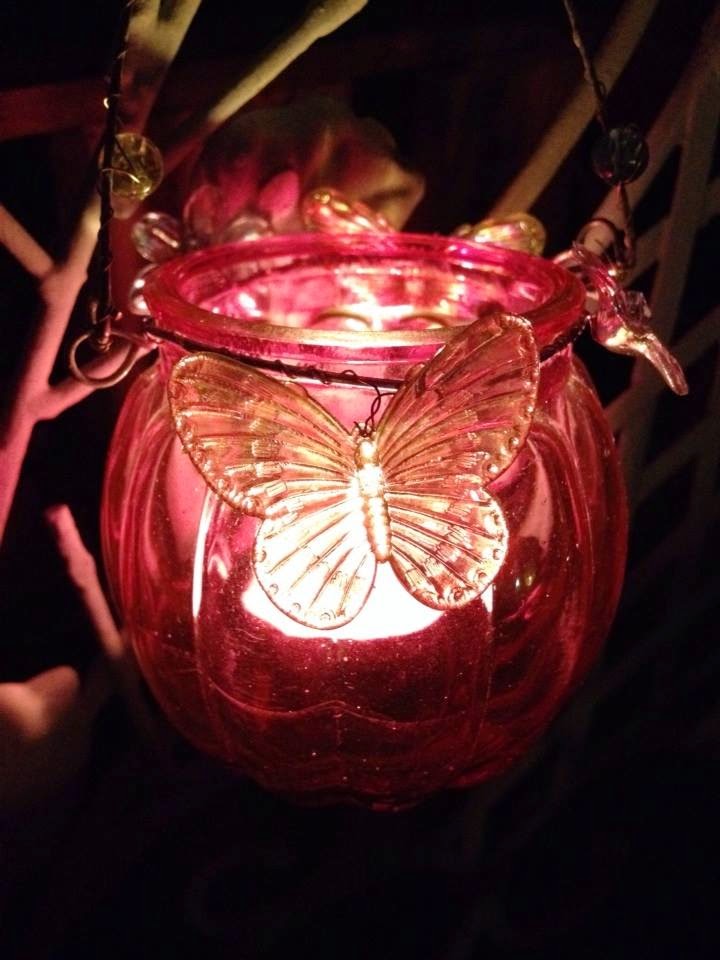
Next up for us to have a little play with was this beautiful and colourful Set of 6 Multi-Coloured Glass Tealight holders with butterflies which are charming! The 6 tealight holders are all in different colours, pink, orange, red, lime, blue and clear and have wire handles adorned with charms and butterflies. They really look pretty on our vintage garden table!


With us having some lovely warm evenings, and much evening time is spent outdoors, it is at night where they really sparkle and delight! Of course with them being hanging lanterns I knew the exact place where they would look lovely. I got busy hammering in safe hooks so the tealight holders could be hung safely and securely. 


I couldn't wait for it to get dark and I could light the tealights!


They really looked wonderful hanging next to where I sat, and flickered beautifully against the coloured glass. The holders looked just as pretty on the table too.


I have a soft spot for butterflies, so the beautiful butterfly detail really took my eye.


And it goes without saying, I especially LOVE the pink tealight holder!


These really are a lovely set of tealight holders and would make a wonderful and special gift for someone too. They would be perfect for an evening celebration, to hang delicately in the tree branches. I tend to have a sprinkling of candlelight all over the garden, whether it be my little lanterns or mosaic glass solar lights, but nothing twinkles quite so prettily as these cute little things, and they definitely get the thumbs up from me! 

Dotcomgiftshop shall always be my first place to visit when looking for pretty, unique and price friendly items. They do a great sale and many a time I have purchased quirky and fun items for the children. I think another visit to the website from moi is on the cards for sure!

X

Disclosure: We were provided with the above two products for the purposes of this review blog post. All words and opinions my own.  

Monday, 14 July 2014

Loom Band It! - Book Review

If your household is anything like mine, these last few weeks you must like me be finding these colourful loom bands all over the place and in every nook and cranny. It seems the loom band craze is taking over the world and both my children have been a part of it. To be honest, anything craft related and that gets them off their gadgets I'm all for it. I know there has been a little press about making the bands on fingers and it not being ideal so we invested in a loom to make them on, not an official Rainbow Loom® but a decent, budget friendly one and it came with 2000 colourful bands! When the children and I (oh yes I had to get in on this craze too) were on the hunt for some user friendly projects, the opportunity came to review the yet to be published Loom Band It book, created by Kat Roberts, a designer and Tessa Sillars-Powell a professional crafter. With 60 rubber band projects for the budding loomineer, it looked a great book, so we jumped at the chance to give it a whirl! 


As expected, it is a lovely colourful book and as soon as it arrived we couldn't wait to get started on a project. It has a great introduction, with useful topics such as getting to know your loom, equipment and materials needed, and how to set up the loom etc. The book does emphasise it's focus on designs and methods achievable on the Rainbow Loom® so there could be some projects not compatible with our more basic loom, but all the projects we have done so far have been fine on ours. After the children had a little flick through the book and a practice, it was my turn. I really wanted to have a go at the pom pom band. I just loved the look of the pretty little pom poms attached to the chain. The loom was really easy to set up following the instructions and I knew I wanted to use a colourway personalized to me.


It came out really well!


Hmmmm a matching ring would look nice don't you think?


It was made following the Star ring project and again I used my own colour choices. It looks like a lovely pink rose ring. I thought I'd then go on to try out the button ring and again very easy to set up. I had the perfect button in mind I wanted to use.


It looked so sweet when I'd finished it.


As Miss Poppins helped, it was all hers, but I couldn't resist a little try on before giving it away :)


Miss. P then wanted to have a go at her own project and she made this lovely Rainbow. The book is set out in various chapters, and the rainbow is in a chapter made up of 'lucky charm' projects. She'll probably add a key ring and pop it on her school bag. 


I really like the simple Chevron design and we made bands and rings - the children enjoyed using the two different colours to create the chevron pattern. 


I didn't want to get going on something too difficult too soon, but I can't wait to attempt the Corsage design!


As you can see there are clear step by step instructions, diagrams and photographs on how to set up the loom and how to hook that really help - it can get a bit tricky if like me you decide to use different colours as of course the loom diagram shows the colours chosen for the project. I think the more confident you get though, the easier it is to work it all out. The children seem to have mastered the loom very quickly. The youngest member of the household is currently in the middle of making this little fella!


There are often little hints and tips at the end of each project which are really useful too and headed in cool up to date abbreviations that all youngsters must know such as JSYK, FYI, BTW, J4F.
Miss. Poppins is wanting to make this Triple Chain next. 


So, as loom banding has never been so popular, the tutorials in this book will really inspire that creative loomineer in you and we have really enjoyed having a go at some of the projects. Loom Band It is available on pre-order and to be published at the beginning of August.

I can see us using up those 2000 bands very quickly indeed! 

X

Disclosure: We were sent a copy of Loom Band It for the purposes of this review blog post, all words and opinions my own. 

Thursday, 3 July 2014

Plant Me Now Garden Challenge

Back in March I was challenged by Plant Me Now to find an unloved, uncared for area in my garden and turn it into a space that I could be proud of. I decided to create that special area in a space right at the bottom of my garden and couldn't wait to get going. Plant Me Now sent along a variety of perennial plants and I had prepared the area with some compost not long before their arrival.


I was very excited when the plants arrived!


I did my best to keep to plan when planting the different varieties, keeping to the recommended cms apart, and making sure they were planted in the best area of the space to ensure good growth. I can be a little impatient but knew I had to take my time with this and laid them out first to see if I liked the layout before planting. The plants weren't going to bloom over night, so I kept my eye on them regularly and watered as necessary. Unfortunately not long after planting the UK was subject to a very large rain fall and one or two of the plants I think got over watered, withered and lost their leaves. After a chat with an expert at Plant Me Now, it was advised I could cut the remaining poorly leaves off the plant and hopefully it may spring back into action. Well it seemed to have worked as this one that lost all it's leaves is doing rather well now, and with some nice new green leaves. 


It's quite a task to try and remember all the varieties I planted but here are some of my favourites and that are coming along just nicely! First up we have the beautiful and very pink Lupins, oh I love these. 


I especially love their green tips just befor the whole flower is about to bloom.


The vibrant violet-blue colour of the Salvia Caradonna is simply quite stunning! 


Another striking colour is the pink of the Astilbe Astary Rose. It's so pretty and although still gathering it's flowering pace, I can see just how beautiful it is. 


This is the part where I probably get told off a bit....After planting the Achillea Summer Berries, I realised I had miscalculated the distance between the six plants. They just all looked really bunched together and not comfortable in their surroundings with room to breath. So here is where I am yet to know whether I really have made a big boo boo. I decided to bite the bullet and move three of the plants, after they'd established, and to give a more aesthetic look.  Here is what the Achillea looked like before transplanting.  


And here is what three of them looked like after moving.


My plants were basically in transplant shock! To be honest they did look even worse than this pretty much straight away after moving them. I googled everything there is to know about moving rooted plants and now feel a lot more knowledgeable about transplant shock and was something I had never even heard of before. I watered the roots, even gave them a sugar solution (supposed to help) and took around a 1/3 of the foliage off. 


Yes, very droopy, a bit sorry for themselves, though I much prefered them in their new position lined up next to the other three. I was certainly not going to give up on them. I persevered, looked after them (may have secretly spoke to them)  and soon as the days went by they took notice of my care, my sorry's that I plucked them, albeit gently out of their old homes. Soon they gave me a little hello. A little ray of hope that they may be ok in their new home. 


New bright, beautiful green foliage had sprouted from the soil. Surely a sign things may be ok. And the colour came back to their little pods.


I have faith these have made it through their uprooting and shall be just fine. I check on them every day, though I still have my fingers crossed. So, a very naughty girl I've been!! On to brighter things methinks and what could be brighter than the gorgeous Erodium Bishops Form that are establishing well.


And the lovely Shasta Daisy White Knight. 


We got round to changing the fencing and adding some pretty garden accessories. 


I just love the hanging buckets!


Rather than walk past the area with my eyes tightly shut, I now pull up a chair and love to take the new surroundings in, the scent of the lavender plants is so sweet and relaxing! I can't wait for them to flower, which should be happening not long from now. 


As there are one or two areas that look a little empty, I've even popped in some other plants - this one being a heather variety. I may even look into making this an all round thing, and plant some spring bulbs such as tulips and snow drops and then perhaps some winter bedding plants such as pansies. 


So as you can now see, my unloved space has pretty much been transformed into a pretty area with delightful plants and flowers. 


A place to enjoy!


It's exciting that there's still more flowering to come and I am really enjoying learning about gardening. Rather than walk past the plant stalls at fetes as I used to do, I'm now first in line to buy a pretty plant and learn all about it. 

I've definitely had fun on this challenge, thanks Plant Me Now for giving me the opportunity!